
Yesterday I posted the result of my year-long endeavor with hitomezashi, the “one-stitch” style of sashiko done with alternating over-and-under stitches.
 Today I thought I’d post a tutorial so you can try this style of sashiko at home. I bought a pre-printed pattern, but once I got going I realized it wasn’t necessary. Hitomezashi is straightforward, with alternating stitches on a grid. Much like knitting, the repeating pattern is easy to memorize and follow.
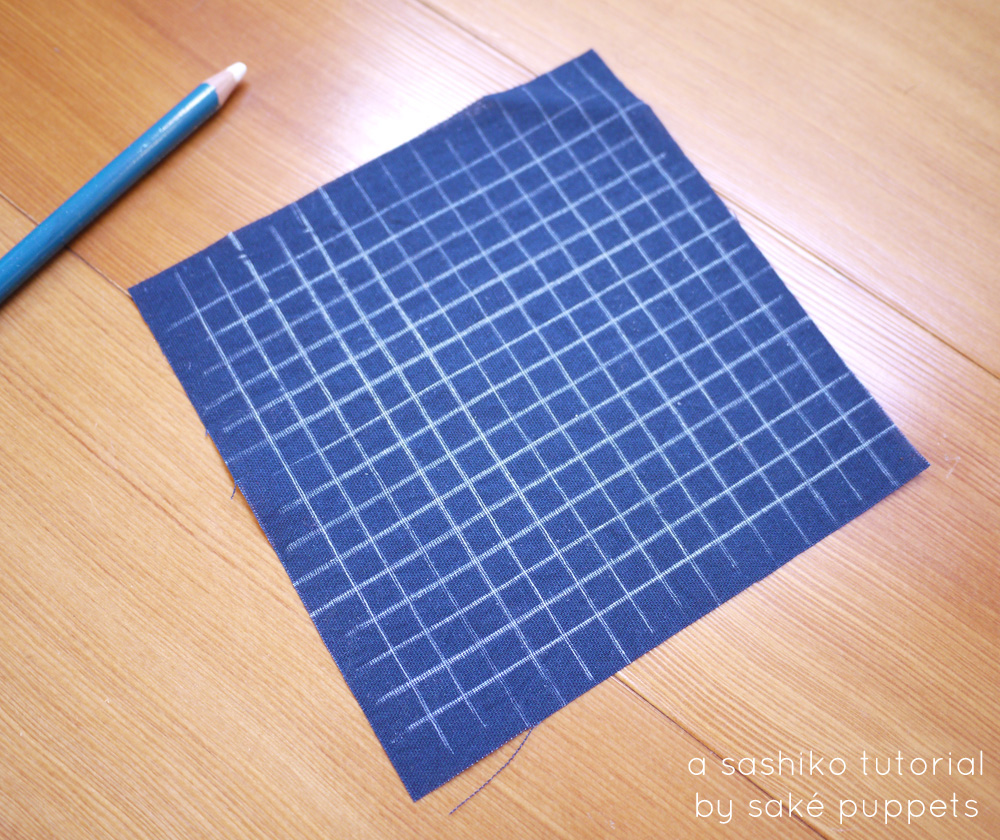
Let’s begin by drawing your grid onto your fabric. I made my lines 1/4″ apart. Draw lightly, you want these to wash out later, but you also don’t want them to wear off too soon.
 Now you’ll simply follow a pattern, making one stitch per space on the grid.

Stitch all of the horizontal lines first, then proceed to stitch all of the vertical lines. In the end, your pattern will emerge!
 I have broken the kaki no hana (persimmon flower) pattern down and isolated just the horizontal and vertical stitch lines in separate graphics. This pattern is done on a repeat, so you can make your project as large (or as tiny!) as you’d like. The key to remember is that as you work your line, you are always alternating stitches — one up, one down, one up, one down, and so on. If you skip a space on the grid, it will throw your whole pattern off.
Once complete, wash or spray your project with water to remove the grid lines. Hem or use bias tape on the edges for a nice finish.
You can create different designs by changing the patterns on the horizontal or vertical axis. Enjoy! I look forward to seeing your masterpieces!


Pingback: Persimmon Flowers Sashiko | Saké Puppets
beautiful!! you make it look so easy, but i’m sure it’s not… at least not with my clumsy hands!
You can do it! 頑張ってください!
Thank you. Your work is beautiful!
Thank you! (^O^)/
Nice clear instructions. Thank you.
Thank you for clear directions. I have been looking for something like this.
Can’t wait to start my project.
Pingback: Sashiko – Parsi ja paikkaa vaate japanilaisittain – Korjaussarjakollektiivi
Hi,
Your tutorial is wonderful! But I’m wondering if you can tell me what kind/brand of pencil you used for marking the fabric and
How do you get your stitched lines so straight? I’m really having a hard time with that.
Thank you very much,
Ann
Hi Ann, thanks for your message! I tend to use Clover products, either a chalk pencil or a water soluble pen will work. Using a long needle and loading a couple of stitches onto your needle at once will help to keep them straight, rather than doing one stitch at a time. I think you’ve put your finger on the challenge of sashiko! 🙂 Also remember, if your stitches are a little wobbly, it only adds to the charm of your work.
All the best,
Angela
Thank you for helping with my questions.
I also wondered if you could recommend a good type of transfer paper so I could try to copy a pattern onto fabric? I’ve tried interfacing but haven’t had good luck with it.
Thanks so much,
Ann
Hi there, Clover also makes chalk copy paper. Try googling it online or on Etsy and you should be able to find some for purchase. Good luck! 🙂
Thank you 🙂
Hi. I have been watching Japanese ladies do this work. I finally got a name for it and am finally finding people, like you, that are helping me! Thank you!!!