
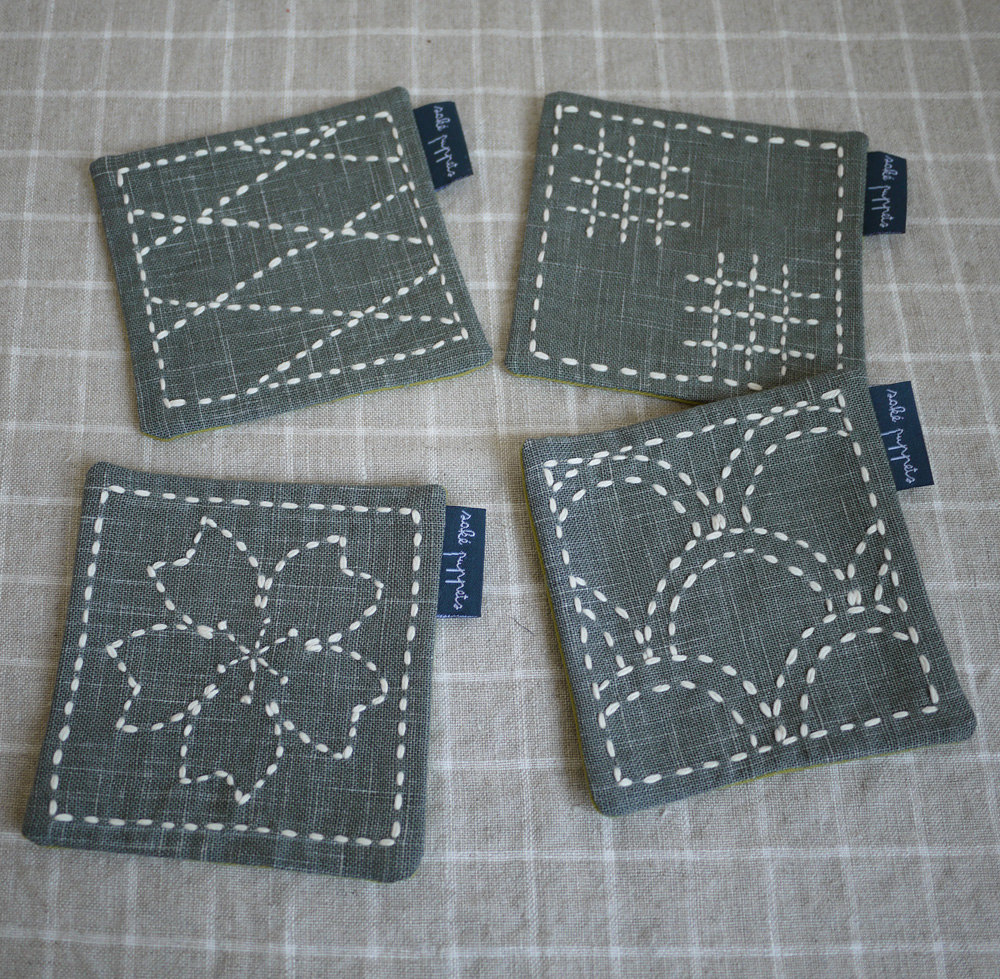
Sashiko 刺し子 is a Japanese style of needlework. Literally meaning “little stabs,” sashiko was originally used to strengthen and reinforce fabric through a series of running stitches.
 Sashiko has evolved into a more decorative form and today is used to create patterns on table linens and tenugui, cloth bags, and clothing such as kimono. Sashiko is best-known for its striking style of natural-color yarn on indigo fabric, though modern patterns are stitched in any color, pattern, or on any fabric.
Sashiko is easy to learn and fun to master. You can check out my shop for kits and patterns, and my Pinterest board for more inspiration ideas. Now, let’s stitch!

How to Sashiko
Materials Needed:
- patterns
- chalk pencil or transfer paper & tracing tools
- sashiko needle
- sashiko thread or embroidery floss
- solid cotton fabric for stitching
Begin by drawing your design onto fabric or transfer a pattern using chalk paper and a tracing tool.
 For transferring patterns I recommend using chalk paper and a tracing tool, but you may also use tailor’s carbon transfer paper, tissue paper and transfer pens, or the light box method.
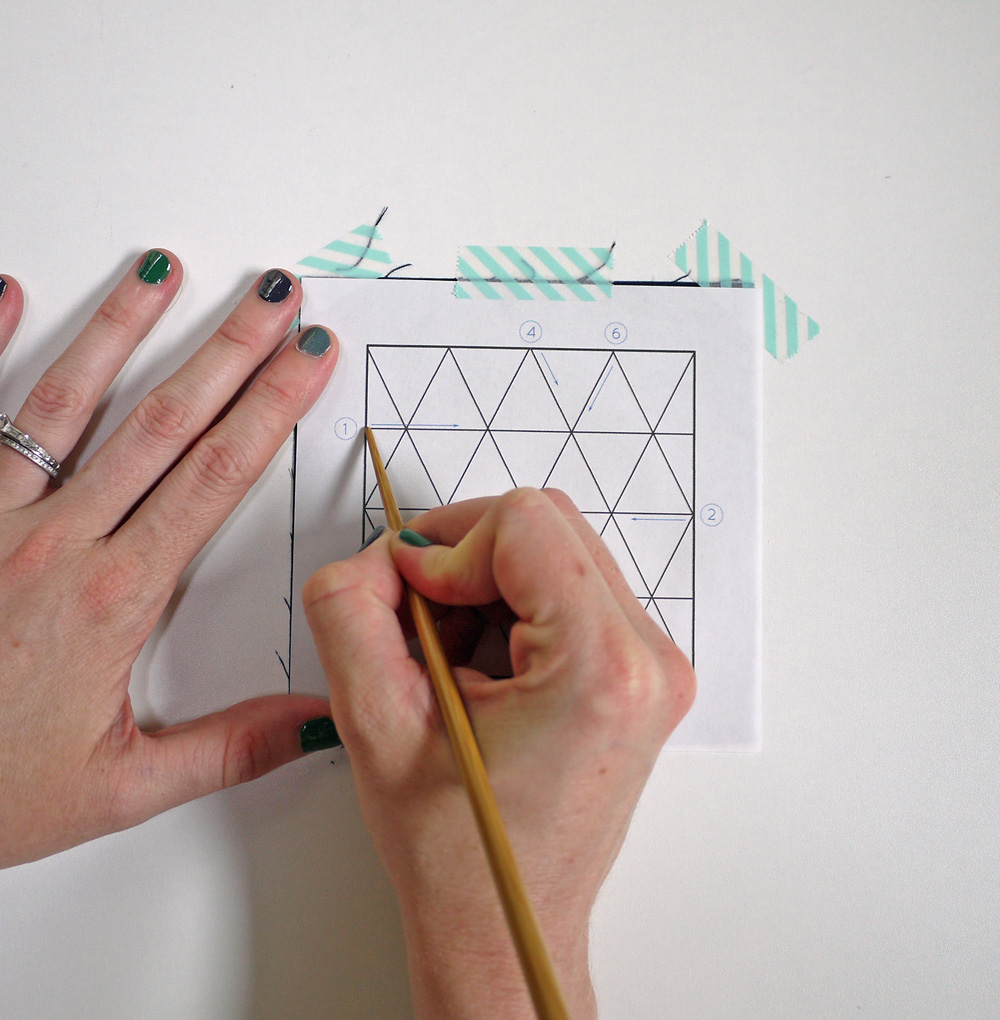
For those using chalk or carbon paper, begin by securing your fabric to a tabletop with washi tape or weights. Place the chalk paper on top of the fabric, chalk-side down. Place the pattern on top of the chalk paper. If you need to extend your pattern, make additional copies and tape them together. Once you are satisfied with your arrangement, tape or weight the pattern so it does not move while tracing.
With a tracing tool or pointy object, trace over all of the pattern lines. If desired, you can place a sheet of clear plastic on top of your pattern to help ease the tool along the lines, but it isn’t necessary.
When all of the pattern lines have been transferred, you are ready to stitch.
 Cut a length of sashiko yarn and thread your needle. For bold stitches double the yarn, for smaller details and a dainty line, use a single thread. Knot the end.
The pattern has been marked onto the “right” side of your fabric, so you will stitch right over the top of the chalk lines. Pull your needle through the fabric at the start of your first marked line and allow the knot to rest neatly on the back, or “wrong” side.
Leave 1/8” (3 mm) of yarn between the knot and your first stitch—this allows for some “give” when stitching and will help prevent your fabric from puckering.

Work your needle from right to left (or left to right if you’re left- handed) along the marked line, making consistent 1/8” to 1/4” (3-5 mm) stitches. Work several stitches onto your needle, then pull your yarn through the fabric. Pull the yarn taught but not tight. Try not to let your fabric pucker. Your stitches should look similar to a running stitch, although slightly longer than the spaces between them. The stitch-to-space ratio for sashiko is 3:2, but no one is counting, just do your best!


If you notice your fabric is puckering, then your stitches are too tight. To fix this pinch the fabric between your thumb and index finger and run them along your line of stitches to smooth the fabric. Try holding the knotted end steady with one hand while you smooth with the other.


Continue stitching the length of your marked line, smoothing as necessary. When you reach the end of a line, make a small knot on the backside of your fabric and trim any excess yarn. Remember, the chalk-marked side of your fabric is the “right” side, and should be facing you.
Leave a little extra yarn before you tie off your row of stitches with a knot. This allows for some “give” in the case that your fabric shrinks a bit during washing, or you discover later that some of your stitches in that row were too tight.
When turning a corner, leave an extra 1/8” to 1/4” (3-5 mm) of yarn looped on the wrong side of the fabric, again, to help prevent puckering. 
Try to keep your corner stitches close together.

At points of intersection on your pattern, space your stitches equally. Maintain symmetry in your pattern and avoid crossing stitches or leaving large gaps. Try not to stitch through the middle of the intersection.

If a pattern has you jumping from the end of one line to the beginning of another, carry your yarn on the backside of your fabric. Leave a little extra yarn loose, similar to when turning corners. Donʼt worry, your stitches wonʼt come out and in the end this will help prevent your fabric from–you guessed it — puckering.

Work the lines that cross the center of your pattern first, going in one direction and then the reverse. This will help to keep your fabric from stretching. If you finish a row and arenʼt happy with the result, donʼt worry! Snip the knot and pull your yarn out. Re-knot and try again.
Good luck!
Interested in trying sashiko? Check out my Etsy shop for some DIY kits and downloadable PDF patterns. Happy stitching!


too cute, i love how you use yarn to stitch…..:)
Lovely tutorial!! Thank you so much!
Thanks Emily!
Pingback: Vive les vacances… | il cavoletto di bruxelles
Pingback: Ricamare in estate: il sashiko | Blogmamma.it
Pingback: I Can Learn to Love Again: A Crochet Story « Saké Puppets
Hello 🙂
I visit this website from your Etsy store. I am a manager in Sashiko company called Hida Sashiko and also a practitioner myself.
I am so impressed by your work and if I could talk to you about Sashiko culture, it would be appreciated. Whenever you have time, please contact me to this e-mail address or find me on Facebook or twitter by searching with “Hida Sashiko 飛騨さしこ”
Thank you 🙂
I’ll be in touch soon, thanks!
Love your site, and yes, thanks for this tutorial.
I recently moved to Tokyo and am looking forward to checking out some of these shops.
By the way, do you know of any place to get washi paper?
Thanks again!
Thanks! Yuzawaya has a paper section, and the art supply store Sekaido in Shinjuku could prove useful. Good luck!
TSWL SENT ME!
this is my fav item: http://www.etsy.com/listing/75894018/diy-sashiko-embroidery-kit-city-tote
you must be having a lot of patience sewing this!tha diy is fantastic
nice to have discovered your blog , its wonderful .
i too embroider…….
i like http://www.etsy.com/listing/64653704/gift-set-wandering-sashiko-drawstring from your shop
tswl sent me here
TO Sew With Love sent me. This is my favorite http://www.etsy.com/listing/72118824/black-friday-cyber-monday-diy-home-decor
dropped in to say thanks for the giveaway . coming from tswl
i like http://www.etsy.com/listing/87013943/black-friday-etsy-snowflake-sparkle from your shop
awesome!
to sew with love sent me!
i love this!
http://www.etsy.com/listing/83769220/cotton-coasters-sashiko-embellished-gift
TSWL sent me. Being an animal lover this is my fave. https://sakepuppets.files.wordpress.com/2011/11/p1090780.jpg
To sew with love sent me. My favorite item is the Sashiko Trio of Bags in Purples.
This looks so fun! To Sew With Love sent me here.
Wow, this is so cool! Thanks! I’ve always wanted to do that, but, well, obviously I didn’t know! lol To sew with love sent me here! 😀 By the way, I’m a new follower! Awesome tutorial- I’m hoping I can learn.
TSWL readers, thanks for stopping by!
Awesome Tutorial! 🙂
To sew with love sent me 🙂
Is it anyway related to darning …… it seems to me so.
Yes! Historically sashiko was used to reinforce and combine layers of fabric for warmth. You might find it on kimono, but more often on heavy winter work clothing. Good eye!
Love 🙂
Very nice work, I like it and I will practice very soon.
Very interested in Sashiko. Great tutorial. Your work is beautiful.
Que bello y practico, Estoy interesada en saber y obtener acerca de bordado sashico. gracias.
This is great! I am not very good at anything related to crafts, but made a surprising discovery fairly late in life (well in my very late 20’s) that I have a bit of a talent with beadwork and off-loom beadweaving. Even though there are some analogous qualities from beadwork to other types of needlecraft, I fall apart into my former uncrafty self whenever fabric gets into the mix. Anyway that’s my story, and why I have been interested in gaining some other skills even if they do not come to me as naturally. Sashiko looks to be quite interesting and due to this post, I think I’ll investigate it further. Thank you for your wonderful description and tutorial.
Bought a book on sashiko and tried it.. It is an exercise in patience. And so rewarding when finished. Love doinbg it, your tutorial was perfect.
Great tutorial. Thank you for sharing.
I am new to sashiko and have just finished stitching 1 small pattern – am hoping to finish it off as a coaster. Your blog here is my point of reference in learning sashiko… 😀 the corners are quite a challenge. Thanks a lot for sharing your tutorials & your work.
My mum did this kind of stitching with pieces of fabric from torn sheets to make dish drying cloths. They were the softest and perfect for delicate items such as stem glasses. Living so far from Japan (in Spain) she had no ideá it was sashiko.
I love your tutorial
Top notch tutorial!! Thank you.
Excelente tutorial, muchas gracias.
what an easy demonstration … thanks for a great tutorial …
Wow! Congrats! Your works are really beautiful! I’m a new sashiko fan and I’m looking forward to creating my first small work. I’d like to ask you a couple of questions: 1) I have the impression that we can’t see the sewing stitch on your coasters (on the 4 sides). Did you sew them by hand using the blind stitch technique? 2) you suggest to use solid cotton fabric: I’m living in Japan as well, so do you know which Japanese terms could I use to find it in a shop such as Yuzawaya?If I ask for cotton they show me normal cotton. How can I find solid one?
merci pour ces détails, it’s lovely
I really would like to make a quilt and someone said that I should give Sashiko a try. I didn’t know that it is a style of Japanese needle work. It does have a really nice look to it! That is wonderful that it is easy to learn as well! I would love to learn how! Thank you for all the great information!